

The first time I tried to nurse my son Eli, I sat on the edge of our bed with a regular bed pillow under my arm. I lasted about eleven minutes before my shoulder gave out, and I spent the rest of the night convinced I was doing something wrong. With my daughter June, I set up a proper feeding spot before she was even born, and the difference was night and day. This is the setup I wish someone had walked me through the first time.
A nursing pillow like the My Brest Friend Deluxe is the centerpiece, but the pillow alone is not the whole story. The chair, the footrest, the lighting, and the little things within arm's reach all matter. Here is how I put together a feeding spot that actually works, step by step, and what I would do differently if I were starting over.
Start with a pillow that stays put
The My Brest Friend Deluxe wraps around your waist and clips in back, so it does not slide around while you are trying to get comfortable. It is the pillow I used for both of my kids, and the one I recommend to friends who ask.
Amazon Check Today's Price on Amazon →Step 1: Pick the right chair and position it well
You do not need a fancy glider, but you do need a chair that lets you sit upright with your feet on the floor or on a footrest. I used a basic glider from a big box store for both kids, and it worked fine. The key is that your back is supported and your elbows are not raised up to meet the baby. If your shoulders are hunched, you will feel it within ten minutes.
I put our glider in the corner of the nursery, facing the window. That gave me something to look at during middle-of-the-night feeds and kept the morning light from hitting June's face directly. I also moved a small side table next to the chair, which turned out to be the single most useful thing in the whole setup.
One thing I did not think about the first time: the direction the chair faces. With Eli, I had the glider pushed flat against the wall, and I bumped my elbow on the wall every single time I adjusted him. With June, I pulled the chair about eight inches away from the wall and angled it slightly toward the room. That small change gave me room to move, and it made the whole spot feel less cramped.
I also checked the height of the chair before I committed to it. Our glider seat sits about eighteen inches off the floor, which is the right height for me because my feet rest flat on the footrest without my knees pointing up. When I sat in a friend's taller armchair during a visit, I could feel the difference in my shoulders within a single feed. If you are shopping for a chair, sit in it the way you actually will at 2 a.m., with a pillow on your lap and a baby in your arms, and see whether your feet still reach the floor.

Step 2: Set up the nursing pillow correctly
The My Brest Friend Deluxe is different from the crescent-shaped pillows you see everywhere. It is a flat, firm surface that wraps all the way around your waist and fastens with a clip in the back. That clip is the whole trick. When the pillow is clipped, it stays exactly where you put it, and you do not have to hold it in place with one hand while you position the baby with the other.
To put it on, I sit in the chair first, then wrap the pillow around my waist and clip it behind my back. I adjust it so the flat surface sits right at the level of my lap, not up under my armpits. Then I place June on the pillow with her body turned toward me, belly to belly. Her head is at the top of the flat surface, and her feet are tucked against the back of the pillow.
The firmness took me a little while to get used to. It is not a soft, squishy pillow. It is firm on purpose, because a firm surface keeps the baby at the right height without sinking. Once I stopped expecting it to feel like a bed pillow, I liked it a lot more. I also learned to check the clip before I sat down. If the clip is twisted, the pillow sits crooked, and no amount of adjusting the baby will fix it.
The height adjustment mattered more than I expected. In the first weeks, I kept the pillow high on my lap so June's mouth lined up with my breast without me leaning down. By the time she was four months old, I had moved it about an inch lower, because she was longer and needed room to move her legs. I made that change one afternoon after a feed where she kept squirming and pulling off, and the very next feed was calmer. If a feed suddenly stops working, check the pillow height before you blame the latch.
Step 3: Add a footrest and protect the chair
A footrest is not optional in my book. When my feet dangle, my lower back starts to ache, and an aching back makes every feed feel twice as long. I used a small wooden footrest that we already had, but a stack of sturdy books or a low stool works just as well. The goal is to have your knees at a comfortable angle and your feet supported.
I also learned to protect the chair. With Eli, I did not think about it, and the glider cushion ended up with a permanent stain from a leaked bottle. With June, I laid a receiving blanket over the arm of the chair before every feed. It sounds like a small thing, but it saved the cushion more than once. I keep a stack of three receiving blankets on the floor next to the chair, so there is always a clean one within reach.
The footrest height took a little trial and error. Our wooden footrest is about seven inches tall, which works for me, but I tested it by sitting with the My Brest Friend Deluxe on and checking that my knees stayed level with my hips. When I used a taller stool one evening, my knees came up too high and June kept sliding toward me. I switched back the next day and the problem went away. If you are between two footrest heights, start with the lower one and add a folded towel on top if you need more lift.
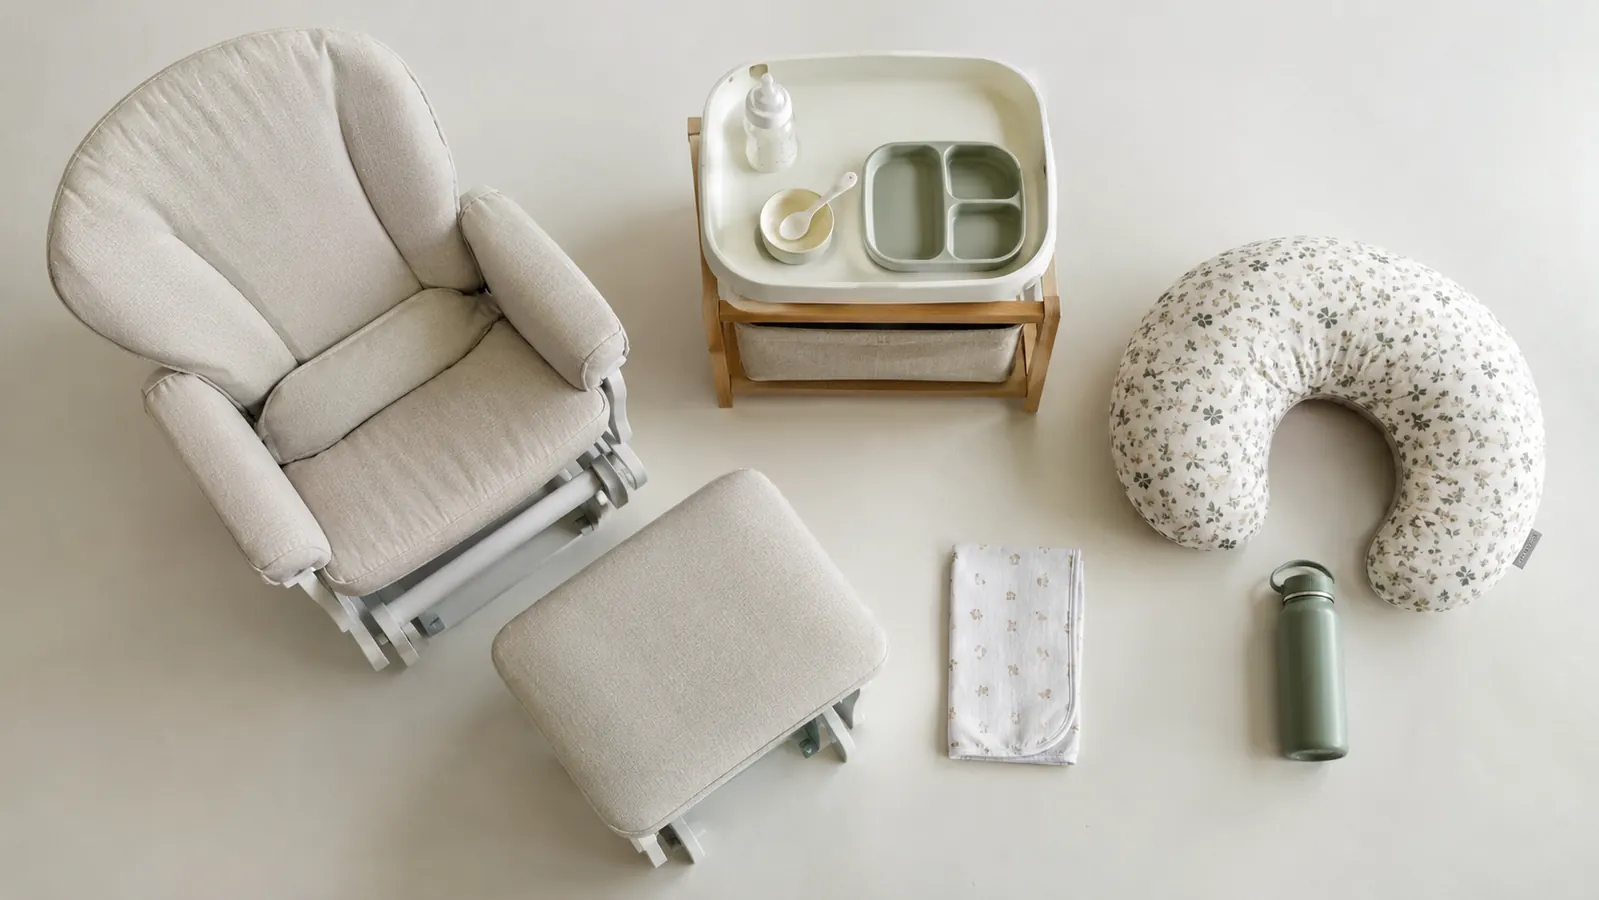
Step 4: Keep the essentials within arm's reach
The side table next to my chair holds exactly four things: a water bottle, a burp cloth, a phone charger, and the remote for the nursery light. That is it. I learned with Eli that if I had to get up to grab something, the whole feed fell apart. The baby would start crying, I would come back flustered, and we would both be worse off.
The water bottle is the one I cannot live without. Nursing makes me incredibly thirsty, and reaching for a bottle without disturbing June is a skill I developed out of necessity. I use a bottle with a straw top, because it is easier to drink one-handed while I hold her. The burp cloth goes over my shoulder or on the pillow itself, depending on the feed. The phone charger is for the long cluster feeds, and the light remote means I do not have to get up to dim the lights for a middle-of-the-night session.
I kept a small basket on the floor next to the side table for the things I did not want on the table itself. It holds a spare pacifier, a tube of nipple cream, and an extra burp cloth. That basket saved me more than once, because there were nights when I did not want to walk across the room to the dresser. I also learned to refill the water bottle in the evening, before the last feed of the night, so I was not stuck with an empty bottle at 3 a.m. That one habit made more difference than I expected.
Step 5: Test the setup and adjust as the baby grows
The first few times I used the My Brest Friend Deluxe with June, I adjusted the clip position and the pillow height several times before it felt right. That is normal. Your body changes in the first weeks after birth, and the baby changes even faster. What works at two weeks will not work at four months.
I also learned to check the setup in the dark. Around three in the morning, I do not want to be fiddling with a clip or wondering where the burp cloth went. I practiced once during the day with my eyes closed, just to make sure I could put the pillow on and find everything on the side table without turning on a bright light. That practice paid off the first time June woke up at 2:15 in the morning and I got her latched without ever turning on the lamp.
As June got bigger and more wiggly, I moved the pillow slightly lower on my lap so she had more room to move her legs. The firm surface still held her at the right height, but the extra room made a big difference in how settled she was during feeds. I also switched to a different burp cloth placement once she started grabbing at things, because she would pull the cloth off my shoulder and onto the floor.
I kept a small notebook on the side table for the first month, just to track what worked. I wrote down the date, the time of the feed, and one line about the setup, like "pillow high, footrest good" or "clip twisted, fixed before feed." Looking back at those notes, I can see that most of my problems were setup problems, not latch problems. If a feed went badly, the fix was usually a small change to the pillow or the chair, not a new technique. That notebook is the advice I pass on to new moms now.
What Else Helps
A few things that are not strictly necessary but made my life easier: a small nightlight in the nursery so I could see without waking June fully, a basket of extra burp cloths on the floor next to the chair, and a comfortable pair of pajamas with easy access. I also kept a spare nursing pillow cover on hand, because the one on the pillow needs washing more often than you would think.
The My Brest Friend Deluxe comes with a removable cover that you can toss in the washing machine, which I appreciated more than I expected. With a baby who spits up and a dog who sheds, being able to wash the cover easily is a real feature, not a minor detail. I washed ours every three or four days in the early months, and the cover still looked fine after six months of that routine.
One more thing: I kept a second cover in the drawer so I could swap it out while the first one was in the wash. That sounds like overkill until the night June spit up on the pillow at 11 p.m. and I had a clean cover ready in under a minute. If you are ordering the pillow, order a spare cover at the same time and save yourself the shipping wait.
The clip in the back is the whole trick. When the pillow stays put, your hands are free to hold the baby, and that changes everything about how a feed feels.
Build your feeding spot around a pillow that stays put
The My Brest Friend Deluxe is the pillow I used for both of my kids, and the one I would buy again tomorrow. It is firm, it clips in place, and it makes the whole setup work.
Amazon Check Today's Price on Amazon →